

Webex Contact Center APIs and Postman Configuration
This blog will focus on being the single place to help you get Postman configured to talk to the Webex CC APIs. There are a good bit of resources available, but they all seem to miss some key pieces of information or are slightly out of date. The hope is that this blog gives you everything you need.
Prerequisites:
- Postman
- A Webex CC tenant with some traffic and configuration.
- A Webex developer account.
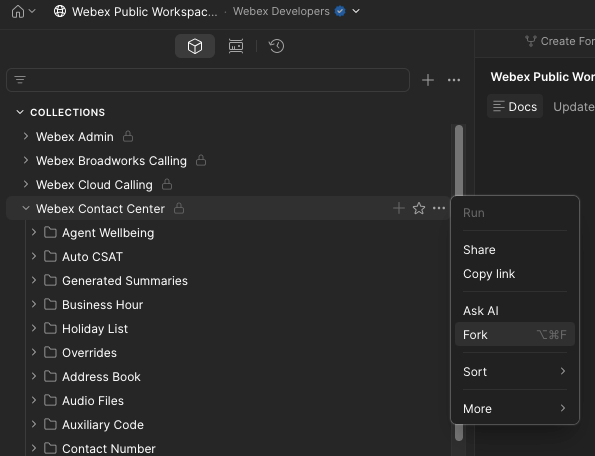
- Fork the official repo
- Go to https://www.postman.com/webexdev/webex-public-workspace-beta/overview?sideView=agentMode and click on the 3 dots next to the Webex Contact Center collection and click on Fork.
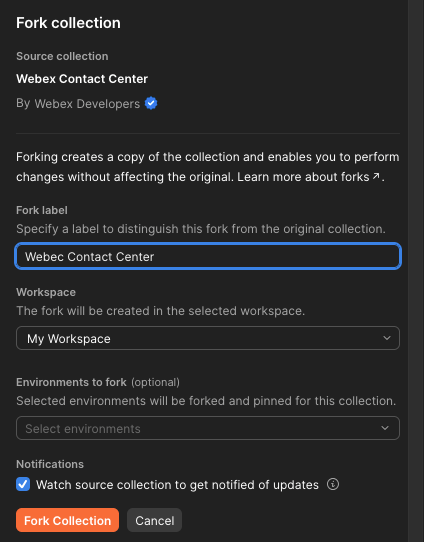
- Choose where to save the collection and give it a name of your choice. I also like to watch the source in case new updates are made.
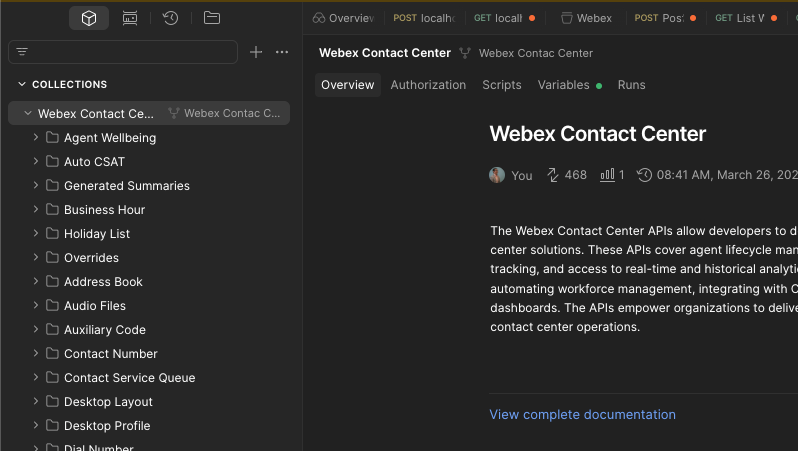
- Open Postman locally and confirm you see the collection you just forked..
- Create a Webex application.
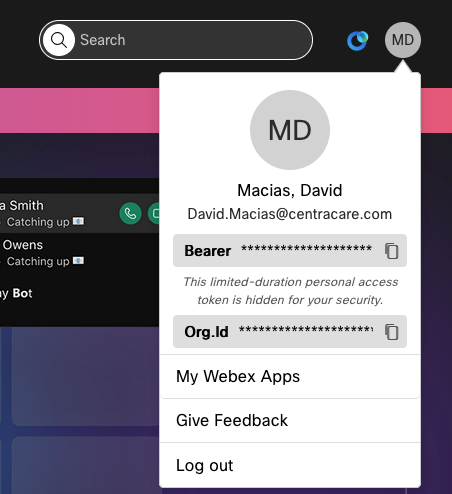
- Login to https://developer.webex.com and click on the top right initials for your name and go to My Webex Apps. Make note of the Org.Id as you’ll use it later.
- At a minimum the app should have the following configuration:
- Mobile SDK: No
- Integration Name
- Icon
- App Hub Description
- Redirect URI(s): https://oauth.pstmn.io/v1/callback
- Scopes: cjp:config, cjp:config_read. Note that this only allows you to read, if you want to make changes via the API you’ll need the config_write scope too. For the scope of this blog we’re only interested in reading.
- Add Integration
- Copy the Client ID and Client Secret details.
- Create a Postman Environment
We deal with a lot of different Webex tenants and using environments allows us to keep their specific information separate.
- Create a new environment and give it a name.
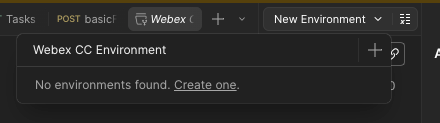
- Add the following variables and values to the environment:
- client_id: What you got from configuring the Webex integration app.
- secret_id: What you got from configuring the Webex integration app.
- scope: cjp:config cjp:config_read
- auth_url: https://webexapis.com/v1/authorize
- access_token_url: https://webexapis.com/v1/access_token
- datacenter: depending on your region (reference https://www.cisco.com/c/en/us/support/docs/contact-center/webex-contact-center/218418-configure-webex-contact-center-apis-with.html) you can set this to us1, eu1, eu2, or anz1
- org_id: Retrieved when you first logged in to the Webex developer page.
- Setup OAuth 2.0 Authentication for the Collection
- Click in the top level container of the collection you forked and go to Authorization and set the following parameters:
- Auth Type: OAuth 2.0
- Add auth date to: Request Headers
- Token: webex_token
- Header Prefix: Bearer
- Auto-refresh Token: No
- Share Token: No
- Token Name: webex_token
- Grant type: Authorization Code
- Callback URL: Authorize using browser
- Auth URL: {{auth_url}}
- Access Token URL: {{access_token_url}}
- Client ID: {{client_id}}
- Client Secret: {{client_secret}}
- Scope: {{scope}}
- Client Authentication: Send as Basic Auth header
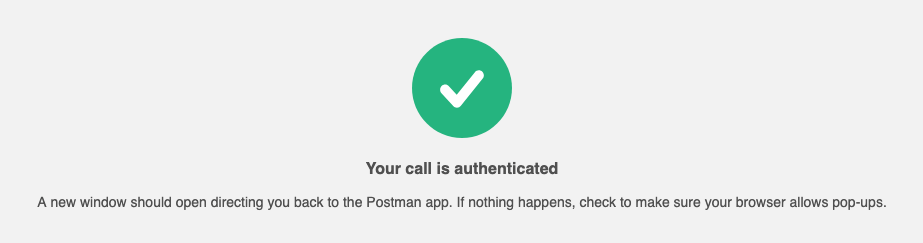
- Click on Get new access token button and you will be redirected to login to Webex (unless you’re already logged in). Authenticate and you’ll be redirected back to Postman.
- Click on Use Token which will set your token to the latest token.
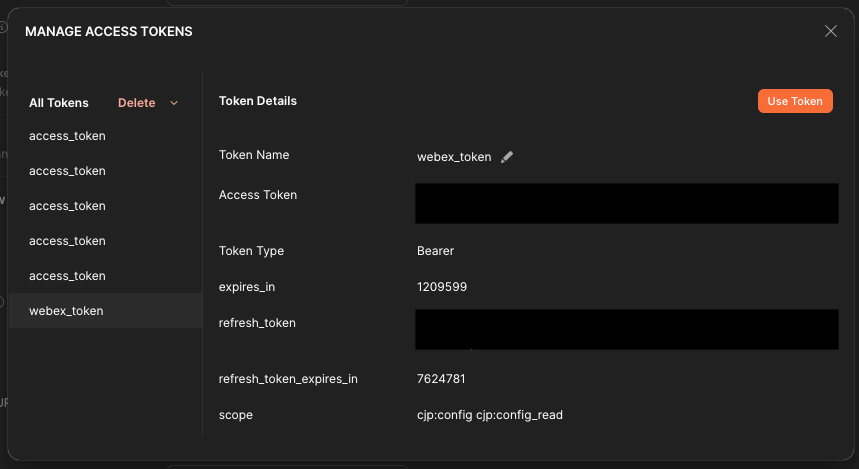
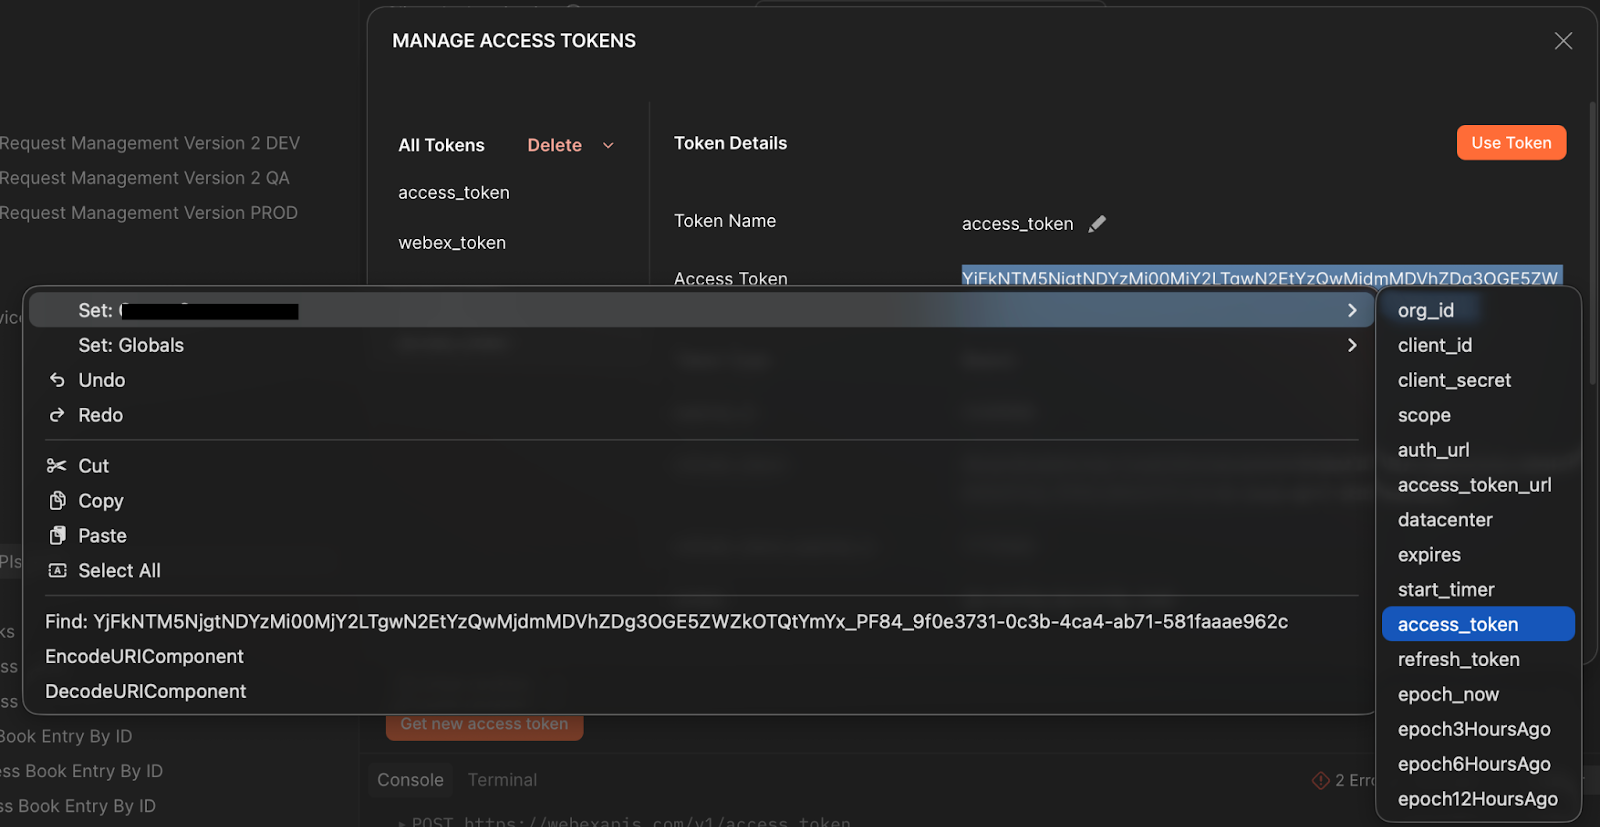
A note about tokens. Postman doesn’t have the ability to automatically update the token in your collection without using Scripts (Another blog post will talk about using these.). So you will have to manually do it. When your token appears select it and right click. Go to Set: {Your Environment} and search for your access_token variable. Remember to do this every time you refresh your token.
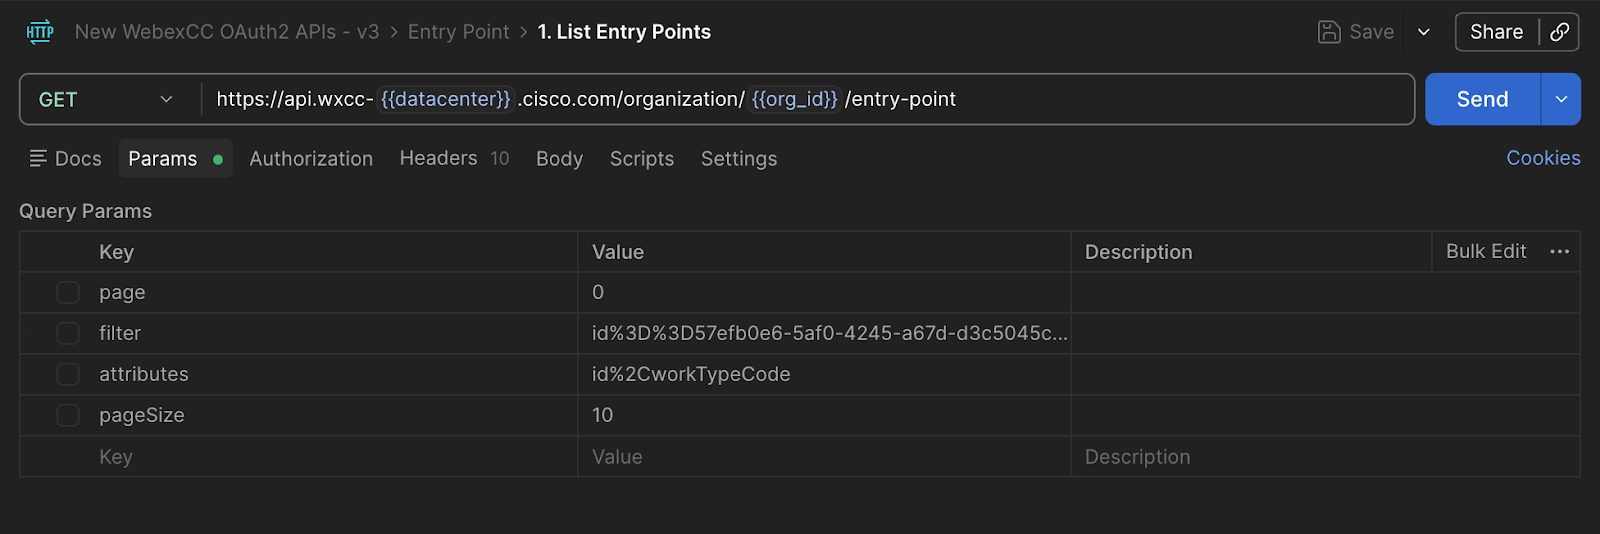
- Make your first request
- Go to Entry Points > List Entry Points and unclick all the parameters
- Change the url from:
{{baseUrl}}/organization/:orgid/entry-point?
To
https://api.wxcc-{{datacenter}}.cisco.com/organization/{{org_id}}/entry-point
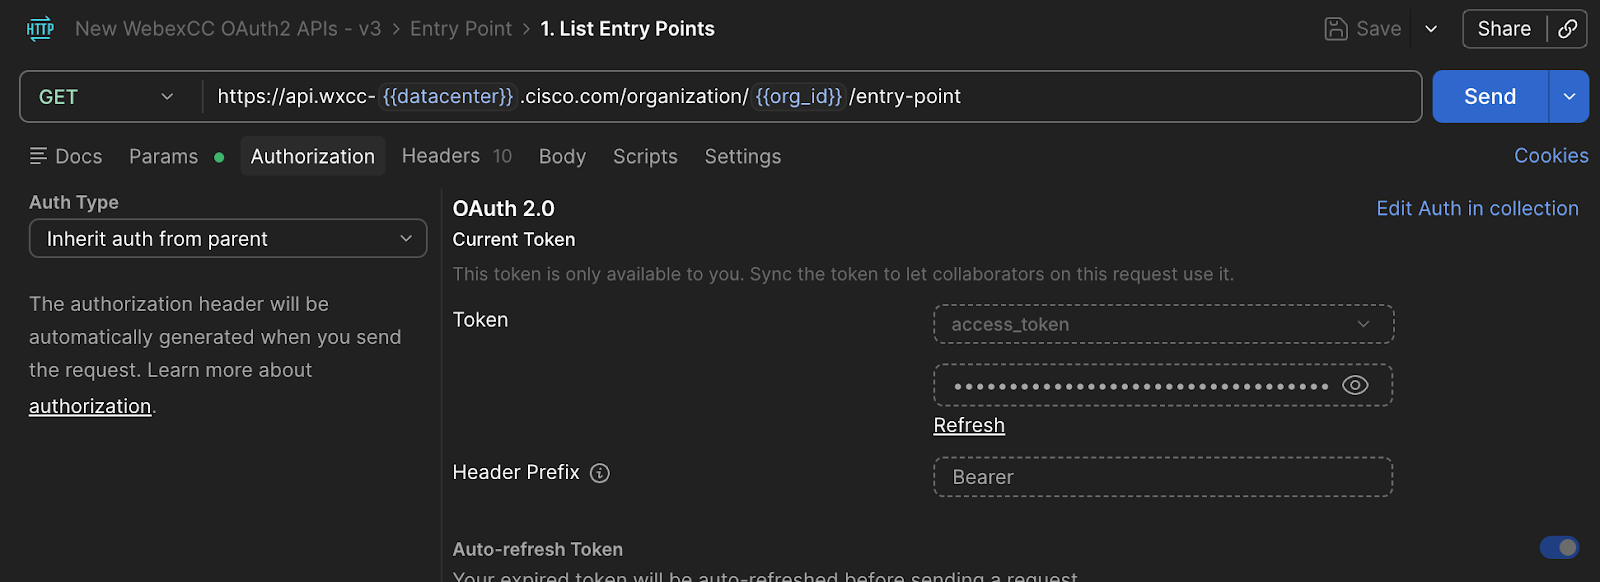
- Go to Authorization and change Auth Type to Inherit auth from parent and ensure the token name is the token from your collection.
- Hit Send to make the request.
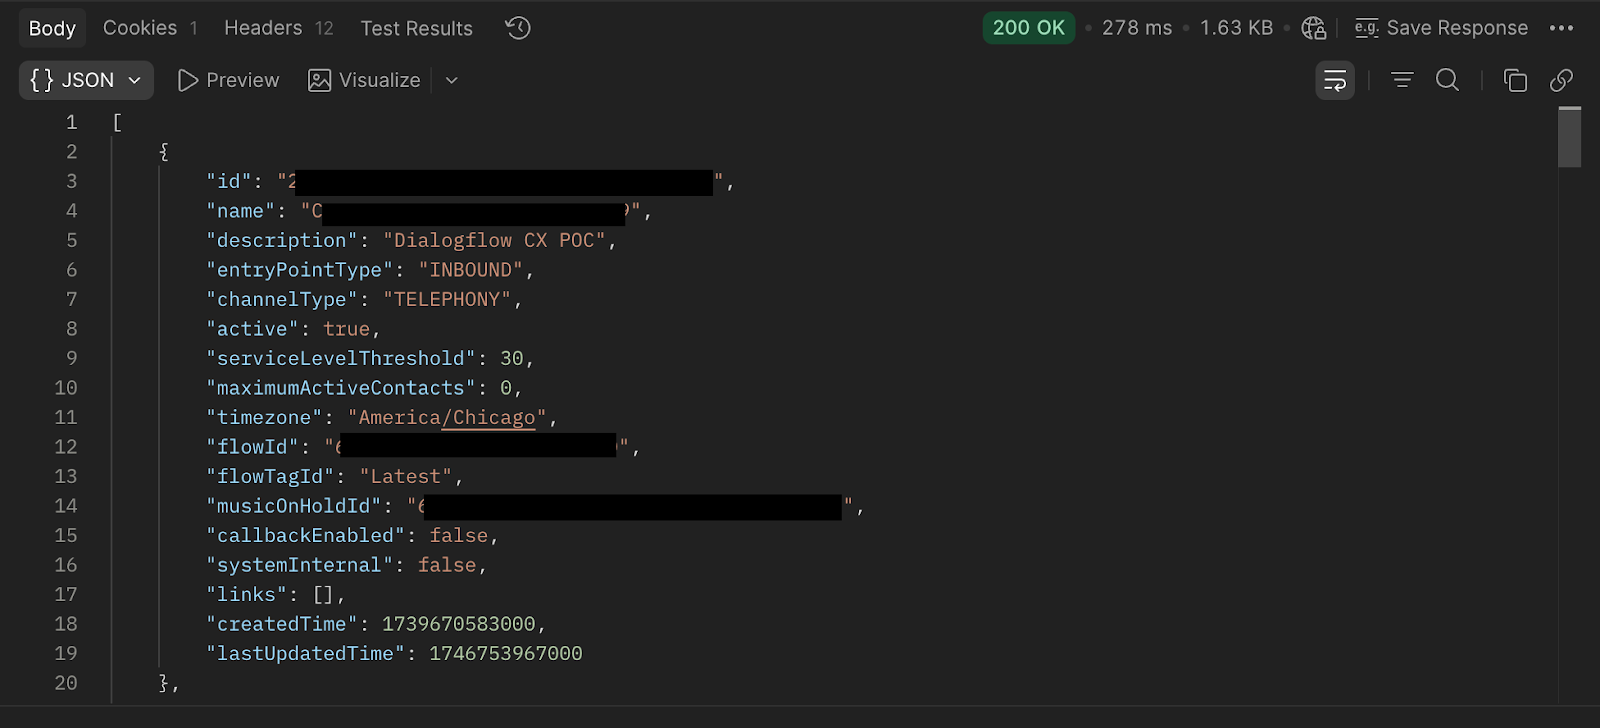
You should see a 200 and get some data. Remember to modify your URL for every request you make.
Transform Your Call Center Strategy
Unlock the Potential of Your Call Center Operations with Expert Consultation