

Getting Started with Webex API using Postman
I recently got a new customer laptop as I am helping them move to Webex Contact Center. It had been a while since I’ve had to setup a new laptop with all my favorite tools and I realized I had some issues connecting Postman to the Webex API from memory. Instead of just looking at the way I had it configured on my Mac I wanted to take the opportunity to use the internet to show me what I had to do. I noticed a few issues with the information I found. Here’s a consolidated guide to getting Postman connected to the Webex API.
Resources:
- https://developer.webex.com/blog/announcing-the-official-webex-postman-workspace
- https://developer.webex.com/
Prerequisites:
- A Webex account, in my case I have an admin account
- Postman installed and logged in
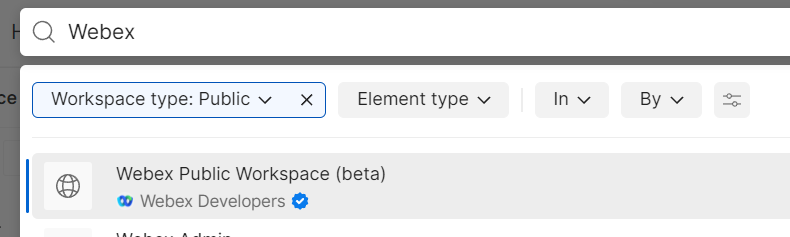
We are first going to fork the Postman collection for Webex API. At the top of Postman you click on Search Postman.

Enter Webex and make sure you’re searching Public Workspaces. You should see the official Postman Workspace published by Webex Developers. Click on it and open it.
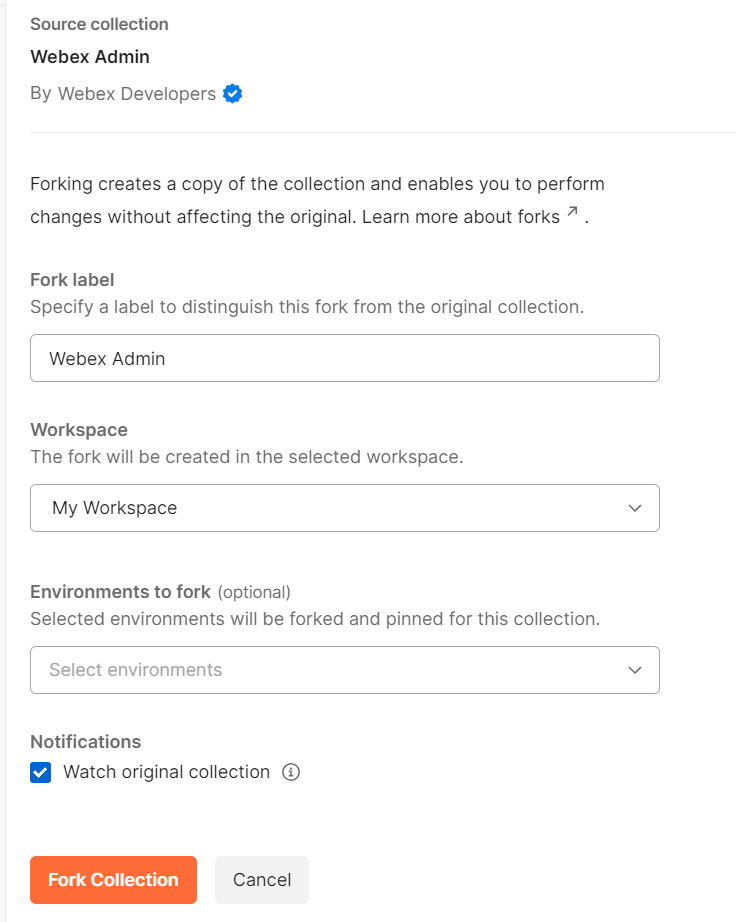
Next we want to fork this so we can make this collection our own. Click on the Fork button.

I like to use My Workspace as a single place for any collection of APIs I am using, so that’s where I will save this fork and give it a name. I also like to watch the original source so I can be notified of any changes. Click on Fork Collection
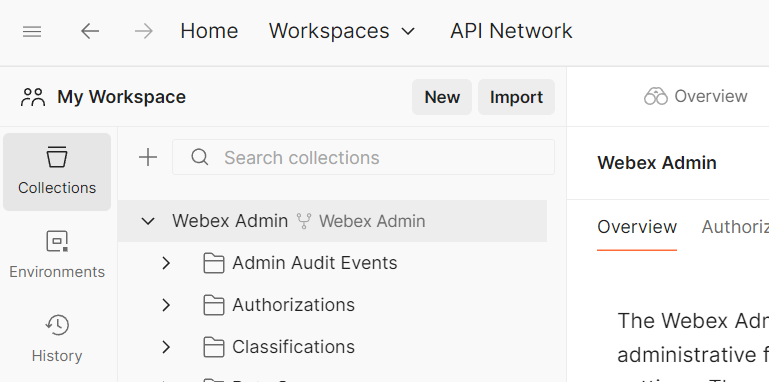
This is what Postman will look like once everything is set up.
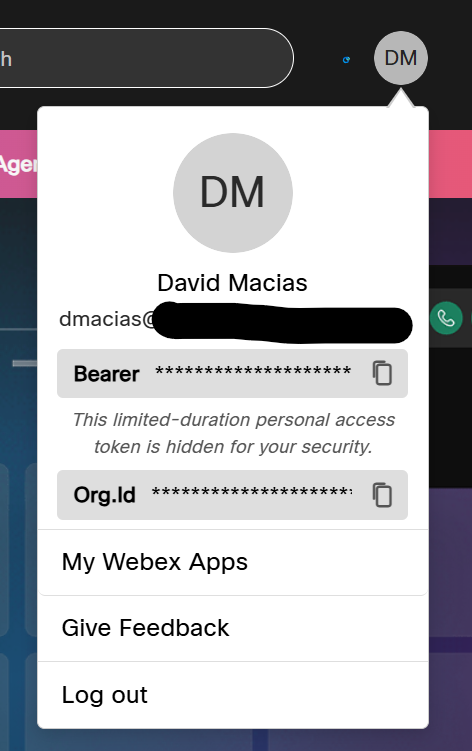
At this point we need some details from Webex in order to authenticate. So we’re going to leave Postman for a bit and head out to https://developer.webex.com/ and login. When you login click on your initials and copy the bearer token. Note, that this token is only good for 12 hours. You will have to do this every 12 hours and get a new token.
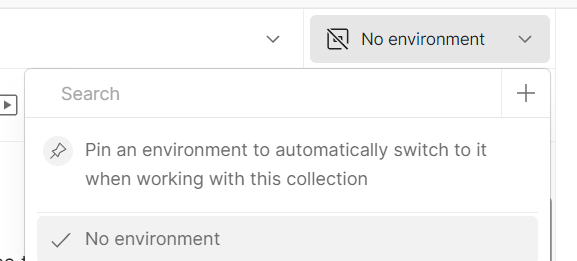
Back to Postman, let’s create a new environment to hold our personal information in a single location. Drop down on the No environment menu and hit the + button.
Give your environment a name and create two variables: BearerToken and WebexOrgId. Copy your bearer token from https://developer.webex.com, but do NOT copy your org ID, we’re going to get this directly from the API.
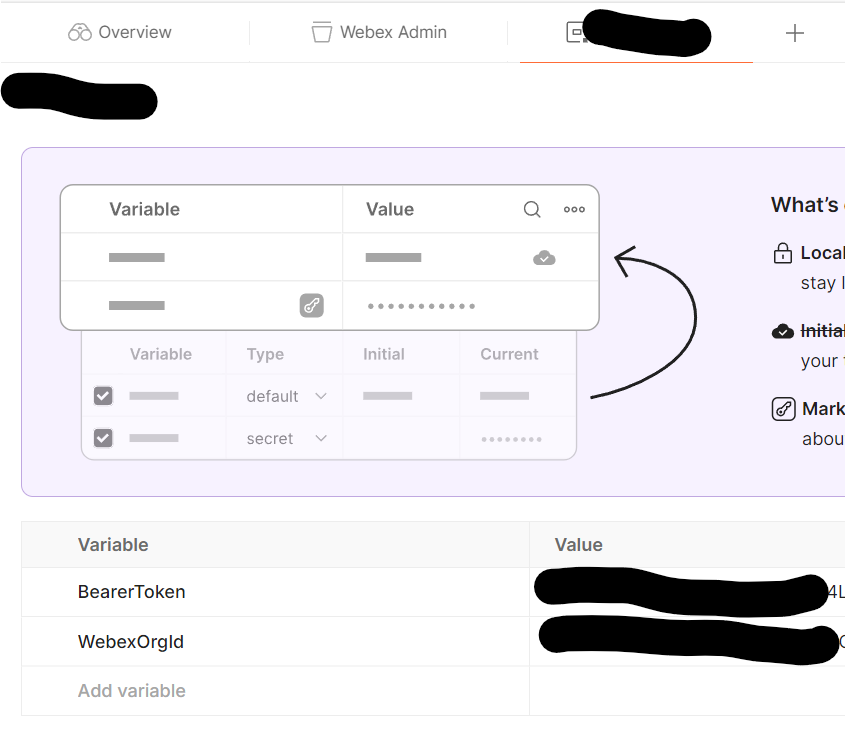
Next, let’s change two other things in the Collection. Click at the very top level of the collection and go to Variables and update your baseUrl to be https://webexapis.com/v1/.

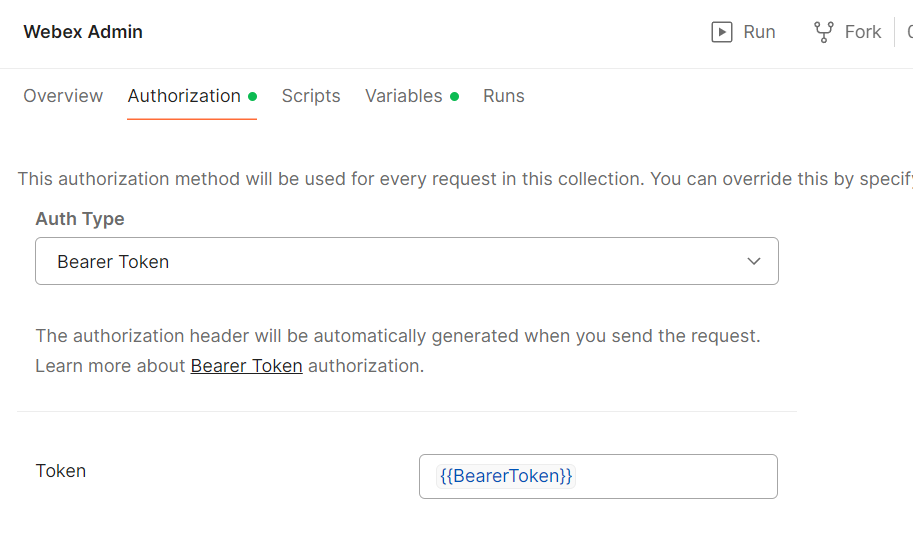
Then click on Authorization and ensure it looks like this.
Now, let’s run our first API request. Go to People > Get My Own Details and run that request and you should see your own account.
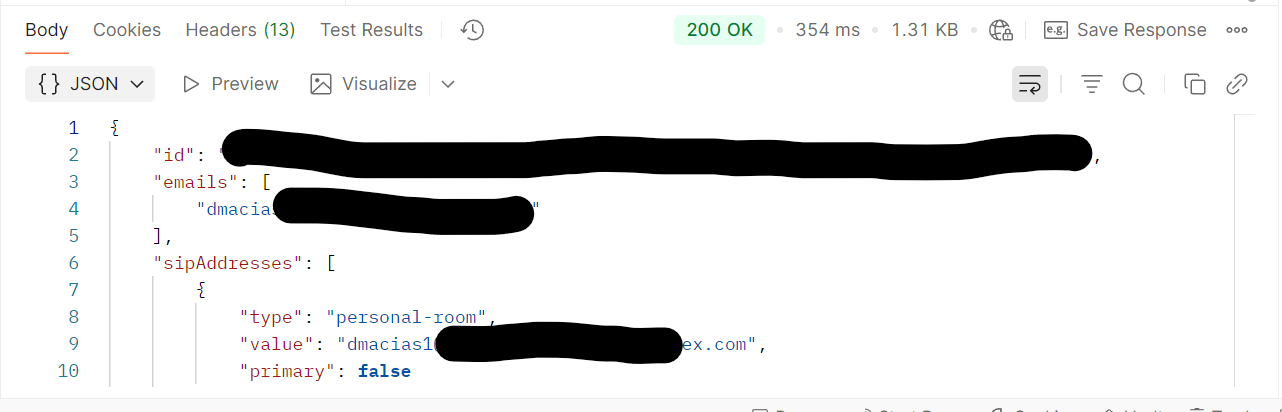
Now, you want to scroll to the bottom and find orgId, select the value, right click, Set as variable. Set this value to the WebexOrgId variable you created in the environment above.

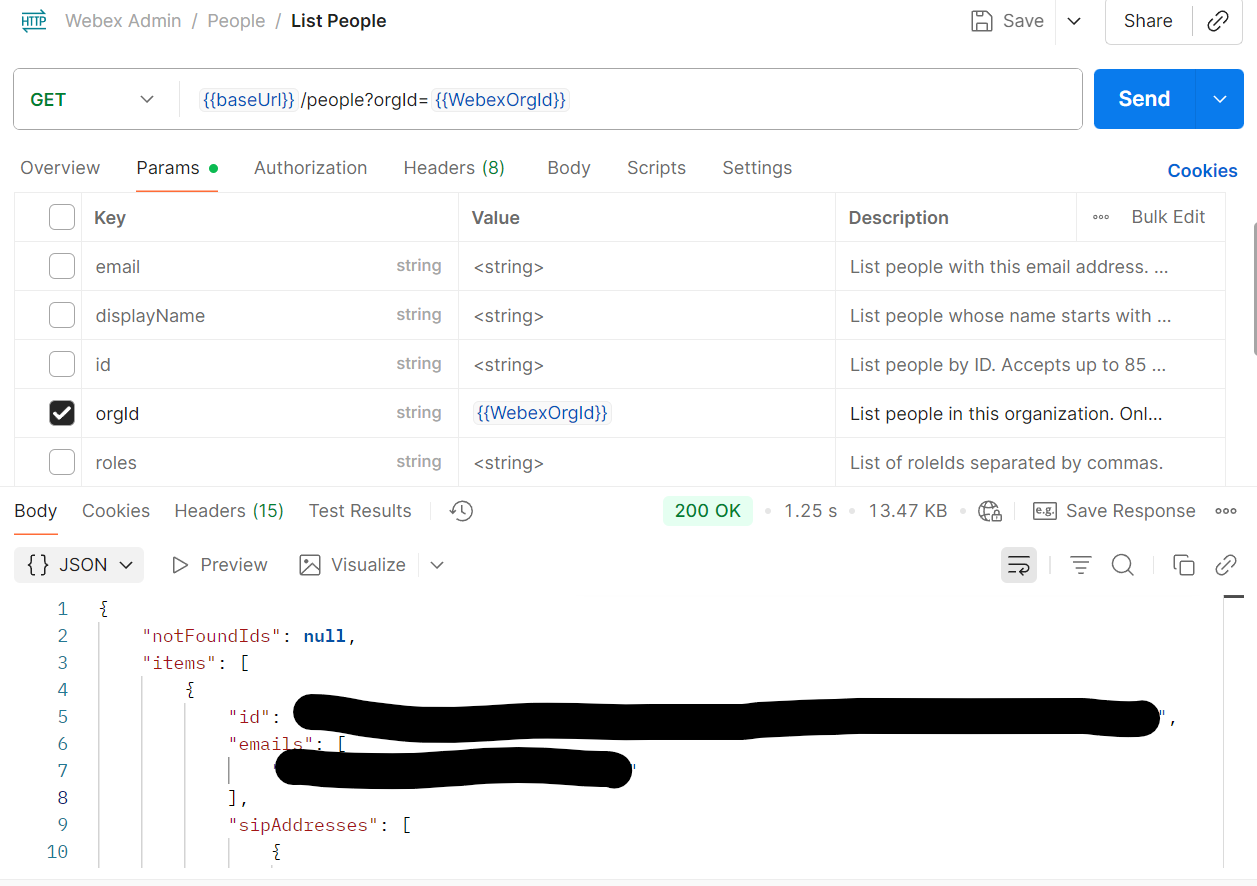
Now, let’s go get a list of users. People > List people. In the Params tab make sure only orgId is selected and you’re using your variable {{WebexOrgId}} and run the request.
You are done, just remember to keep your token up to date and you’re off and running.
~david
Transform Your Call Center Strategy
Unlock the Potential of Your Call Center Operations with Expert Consultation