

Custom Email Domains in Amazon Connect
It's widely accepted that adding an email channel to your Amazon Connect instance is a high-impact, low-friction win to your contact center’s capabilities. However, to truly own the customer experience, it's best to look the part. In this post, we’ll move beyond the default *.email.connect.aws domain and walk through how to configure a custom, branded domain that keeps your communications recognizable and trustworthy.
Prerequisite: This guide assumes you have already enabled the email channel and are currently using the default AWS-provided domain.

Before we start, make sure you have access to and have configured the following:
- AWS SES [https://aws.amazon.com/ses/] service that is no longer in sandbox mode. Please follow this quick start guide for moving out of sandbox mode [https://docs.aws.amazon.com/ses/latest/dg/request-production-access.html].
- A DNS providers configuration dashboard. We’ll be using Cloudflare [https://www.cloudflare.com/], but this setup can be done across most DNS providers.
- Amazon Connect instance access. Not the Connect dashboard, but where the instance is configured.
SES Configuration
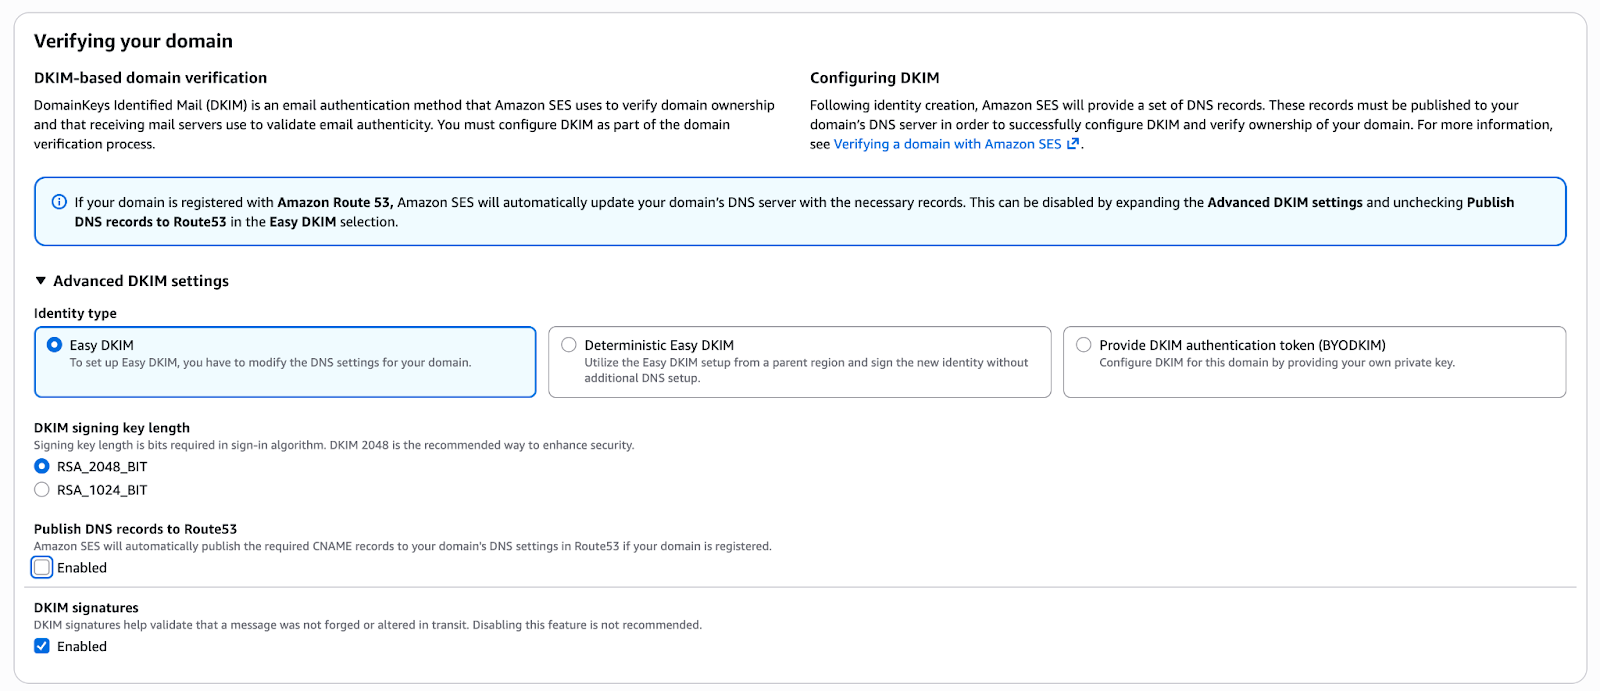
- Login to AWS SES > Identities > Create identity. Ensure you use the “Domain” option as “Email Address” is not supported in Connect. Under "Default Configuration Set,” ensure you choose the configuration set for Connect as seen in the screenshot below.

- If your “Name” server is Route53, keep that checked, but since we’re using Cloudflare for our “Name” server, we’ll uncheck that. 2048 length is what is recommended for length and in my experience these settings are standard. If you run into an issue with these settings please check what your “Name” server supports. Once your configuration is complete, click on Create identity.
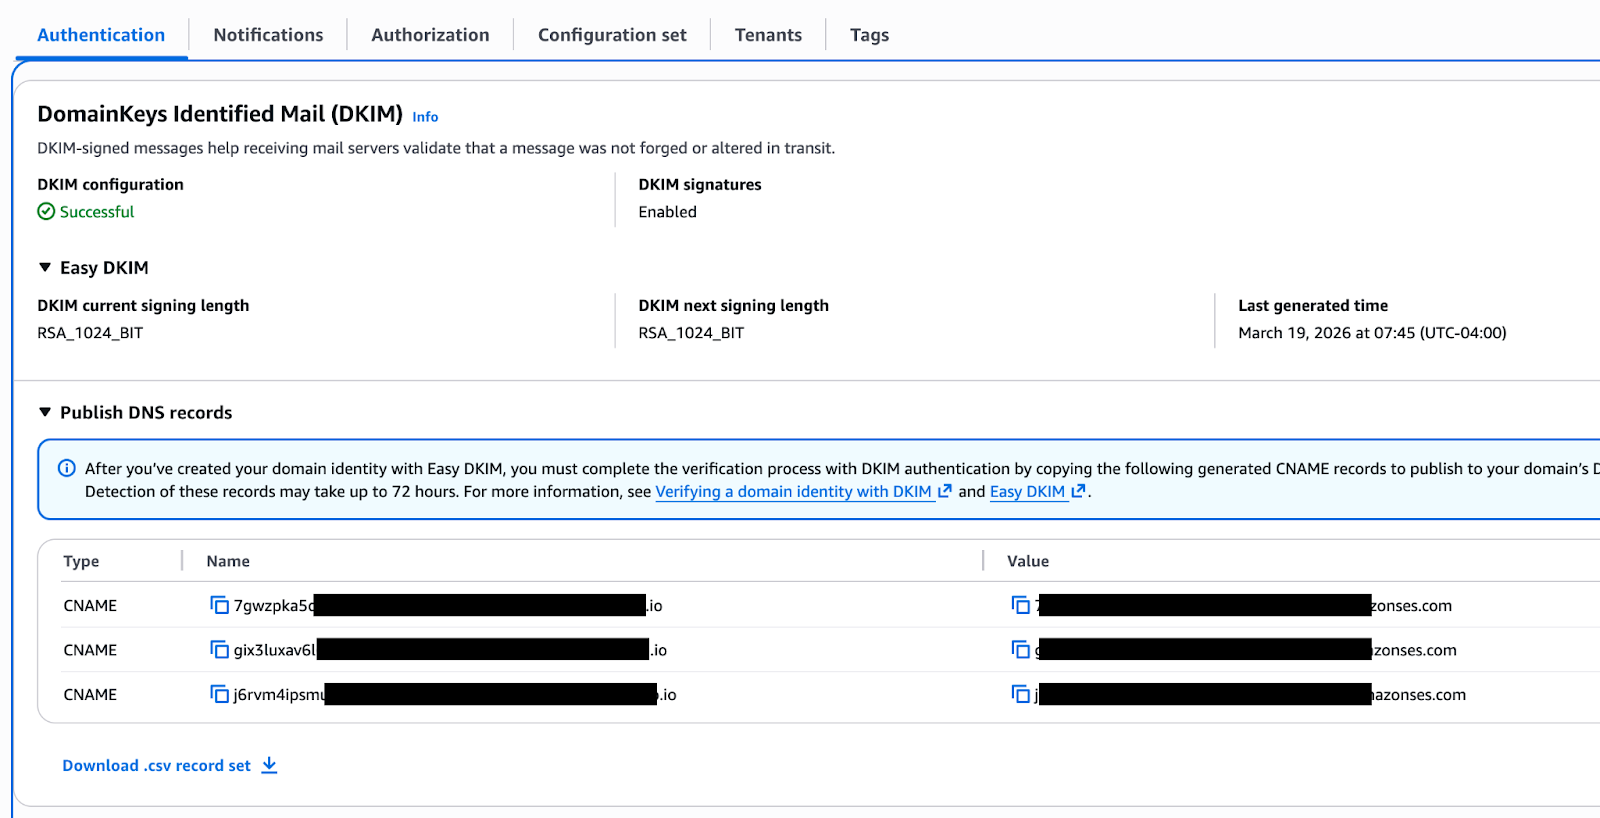
- Click on your identity and locate the DKIM entries you’ll need (generally they will be at the top of the DNS records window). You’ll need to export or copy down all 3 entries.
Cloudflare Configuration
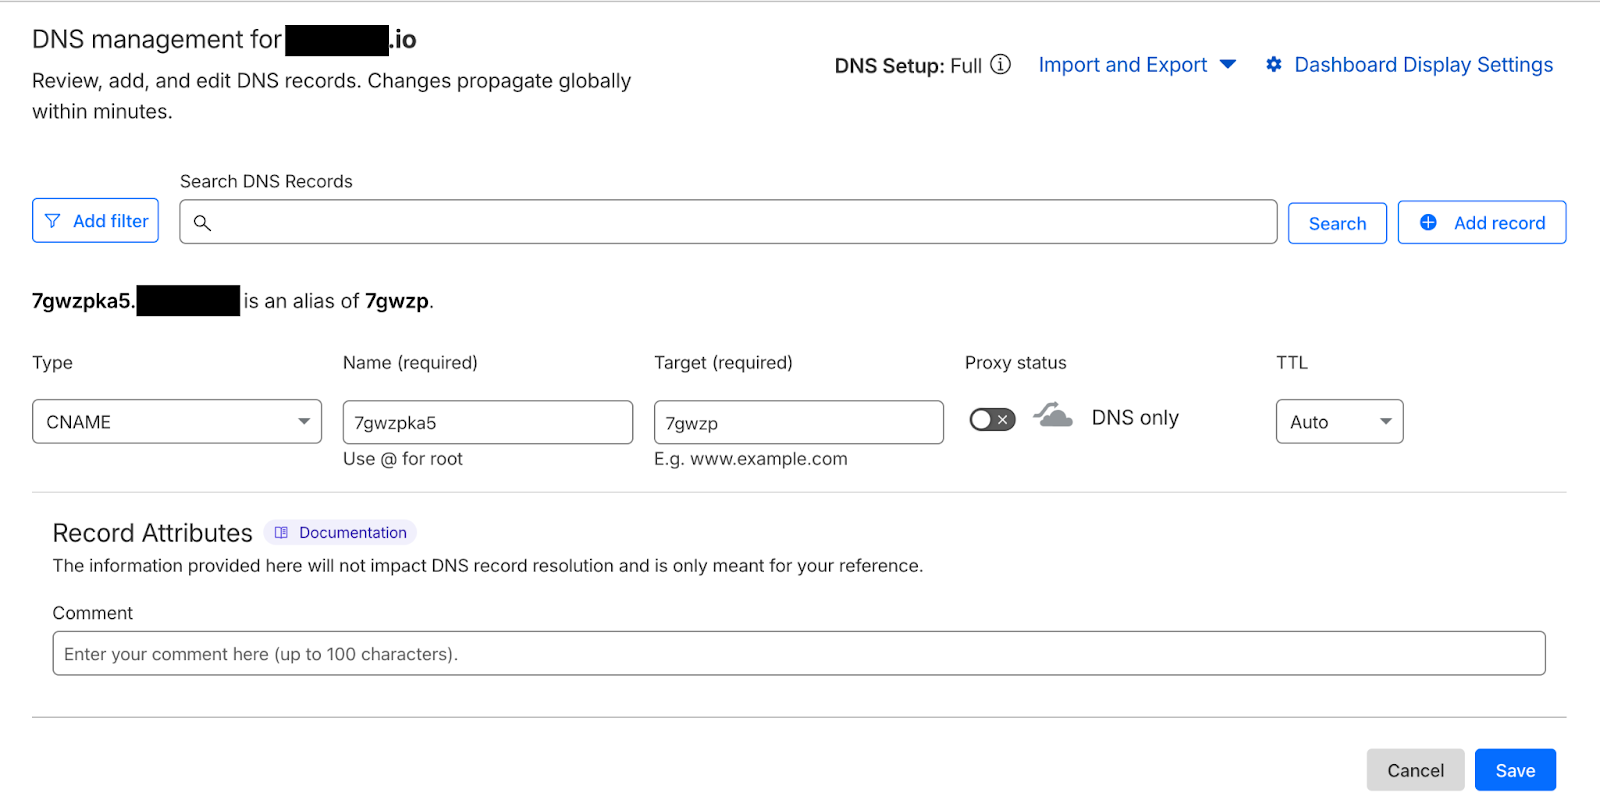
4. Login to your Cloudflare dashboard > Domains > Overview and select your domain. From there go to DNS > Records. You’ll want to add each DNS record one at a time. Ensure you’re not using the proxy option.
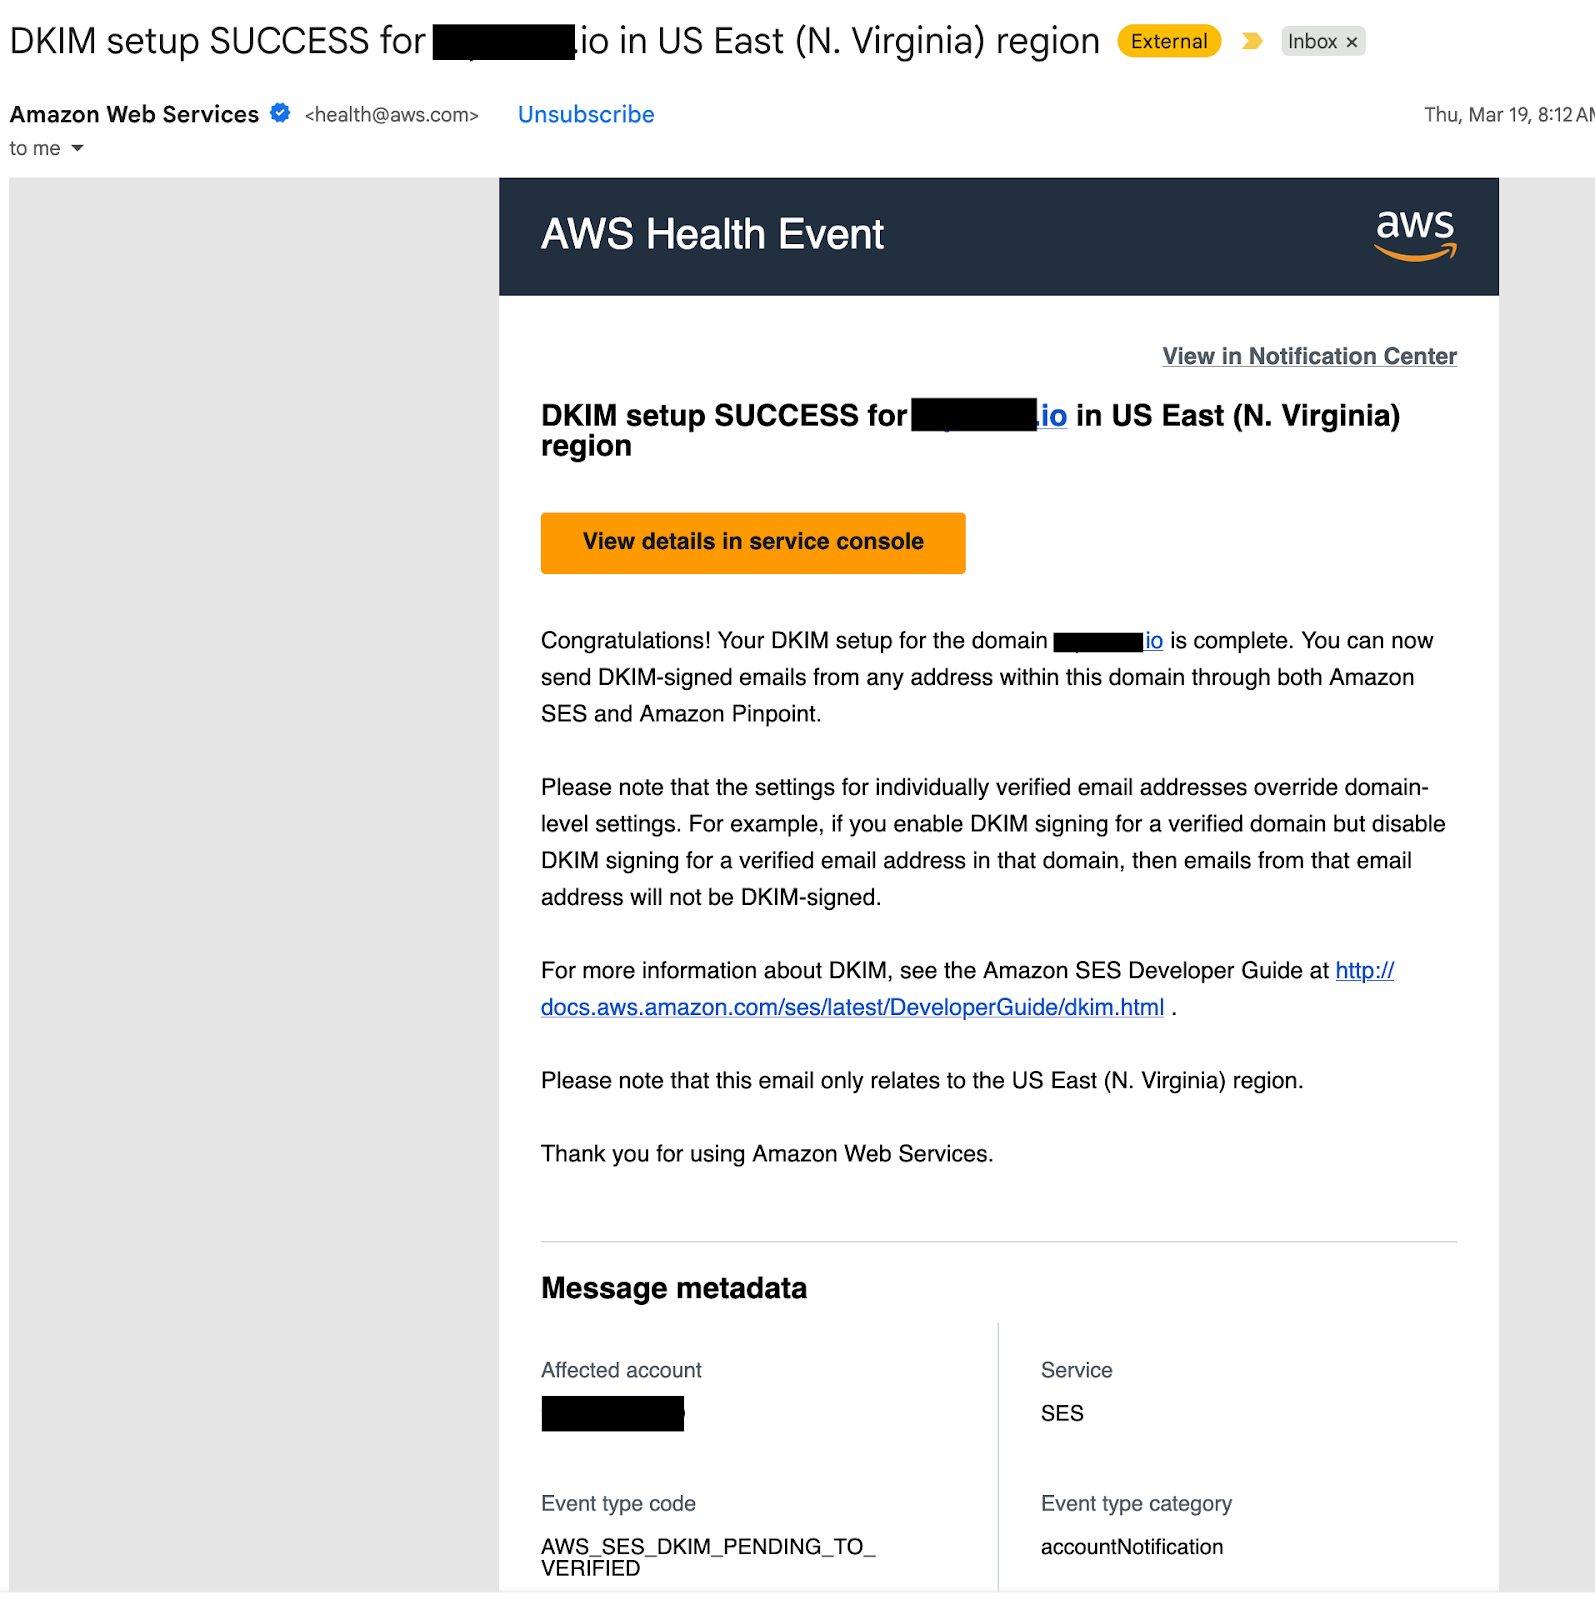
5. Once you have completed adding and validating that all 3 CNAME records have been saved. Return to SES and wait, up to 72 hours, for your domain to be validated. In my experience with Cloudflare it may be much faster and be complete in as little as a few minutes.

At this point you just have to wait for change to propagate. AWS will send you an email once the verification is complete.
Amazon Connect Configuration
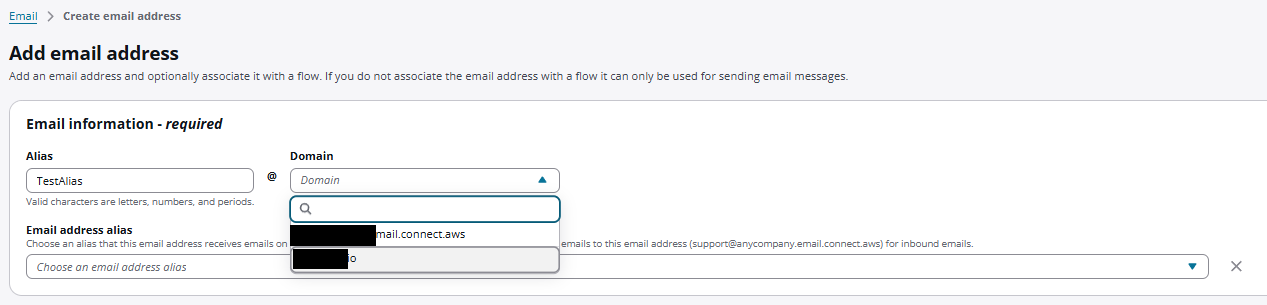
Once everything is validated and approved, you can then go inside your Connect instance and go under the Channels > Email Addresses and create a new email address.
Here you will be able to select the new domain that has been created:
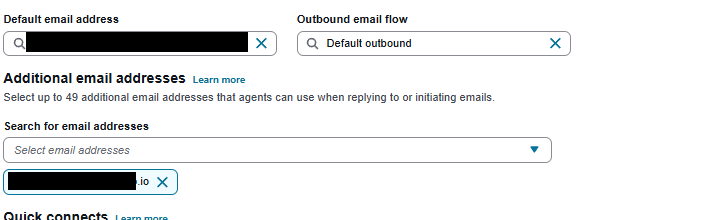
Once created, the email address can be added to queues throughout the AWS instance as per normal. The below configuration is a queue where we have added the new email address as an additional email address to be selectable by users, but you could always set it as your default as well to make sure every outgoing email from this queue uses the new domain.
Transitioning from the default *.email.connect.aws domain to a custom, branded address is a small technical lift that yields significant results in customer perception. While the default setup is perfect for rapid testing and proof-of-concepts, a branded domain ensures that your outbound communications are immediately recognizable and carry the authority of your organization.
Thanks to Jacob Kohane for the review and filling out the Connect specific configuration.
Transform Your Call Center Strategy
Unlock the Potential of Your Call Center Operations with Expert Consultation